Getting Started
New Equipment Setup
Please ensure you’ve received all of the items listed below:
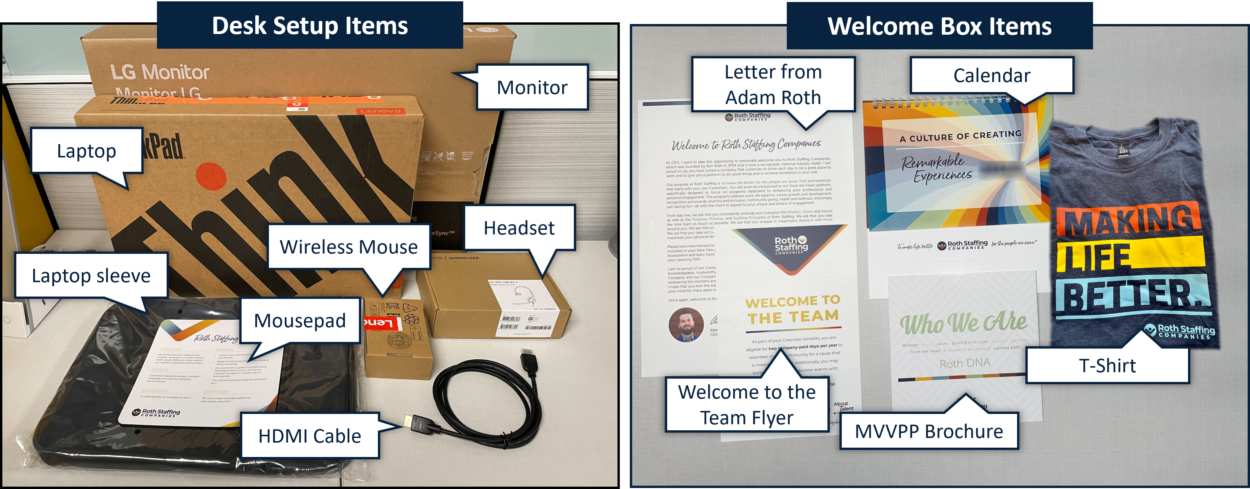
PACKAGE CONTENTS
Desk Setup Items
- Laptop
- Laptop Sleeve
- Monitor
- Mouse
- Headset
- Mousepad
- HDMI Cable
Welcome Box Items
- Letter from Adam Roth (CEO)
- Calendar
- Padfolio
- Mission, Vision, Values, Purpose, Promise brochure
- T-Shirt + Welcome to the team flyer
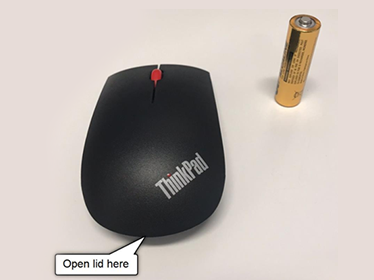
Wireless Mouse Setup Instructions
- Unwrap the battery (it is wrapped in plastic)
- Open lid to access battery input
- Remove the USB Receiver from the slot inside of the mouse and plug into Laptop (see photo below)
- Insert the battery (a red light should turn on under the mouse)
- Reattach the battery lid

Headset Setup Instructions
When you plug in the headset it should begin working with your device immediately
Laptop Setup Instructions
Note: This process will take about 2 hours. If able, hardwiring into the Internet will simplify the process.
STEP 1:
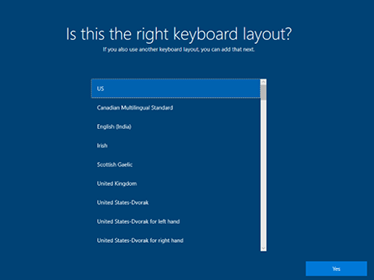
Plug in and power on laptop
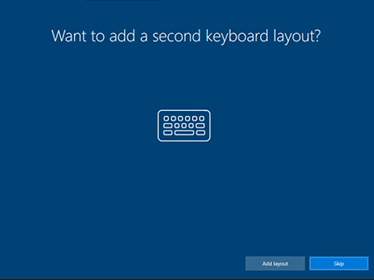
If prompted, select language, country, keyboard layout and skip adding a second keyboard layout
STEP 2:
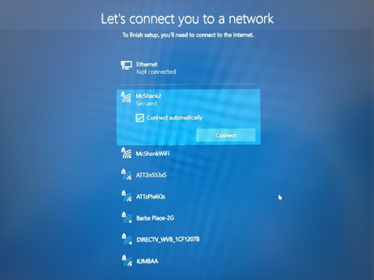
Connect to Network *If you are hardwired you will not receive this message and will skip to step 3.
Connecting from home: Select home WiFi network and enter personal credentials.
Connecting from a branch: Select the Roth network and enter password rothguest.
Note: Once connected, wait 1 minute before proceeding to the next step. Sometimes, moving too quickly at this stage can cause an issue with setup.
STEP 3:
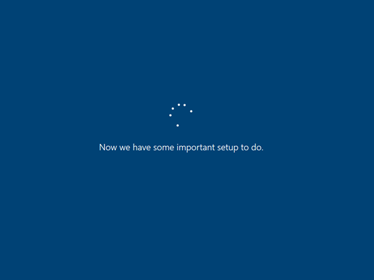
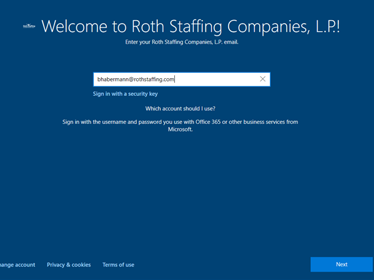
Log in using your Roth Staffing credentials and device will begin to auto-setup.
Note: Your credentials will be emailed to you by your hiring manager.
Please use full email address (Example: solson@rothstaffing.com) and the provided password.
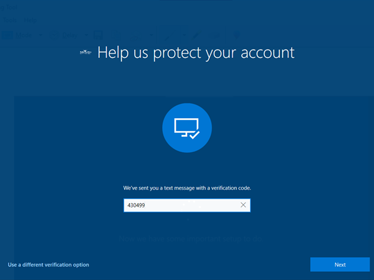
STEP 4:
At this stage you will be required to configure/setup a multi-factor authentication (MFA).
Follow the prompts to set up the MFA.
Note: We recommend setting up MFA using your personal cell-phone number.
STEP 5:
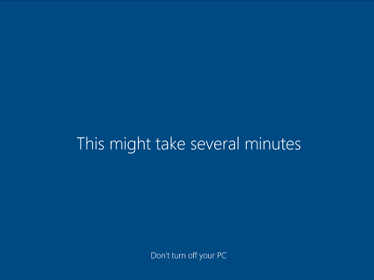
Once MFA is complete, leave the device alone for 30 minutes.
The system needs time for configuration.
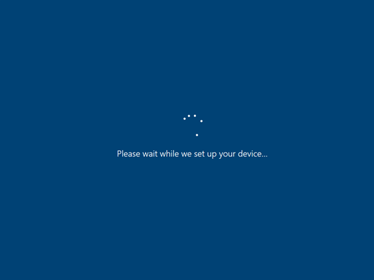

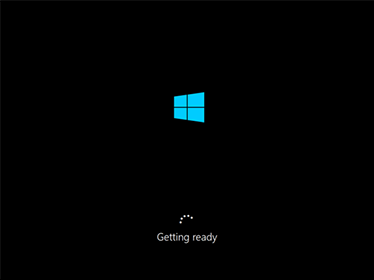
STEP 6:
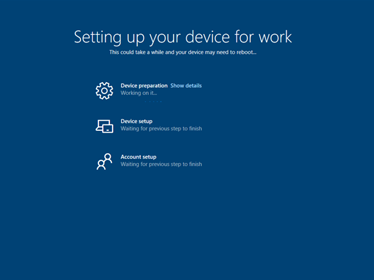
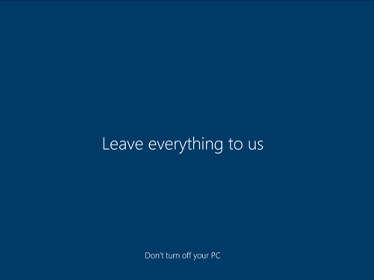
Recommendation: Once you see the screen below, wait 30 minutes before logging in.
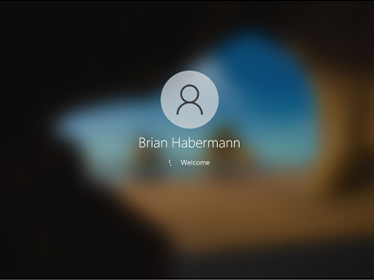
Your device may reboot several times as it downloads apps. After 30 minutes has passed, log in with your Roth Staffing credentials: your username, excluding the email portion (example: solson) and the login password that was provided by your hiring manager.

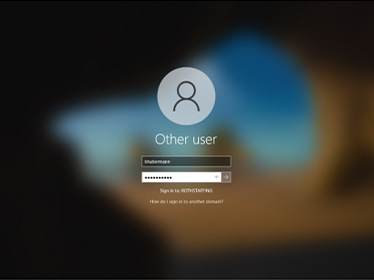

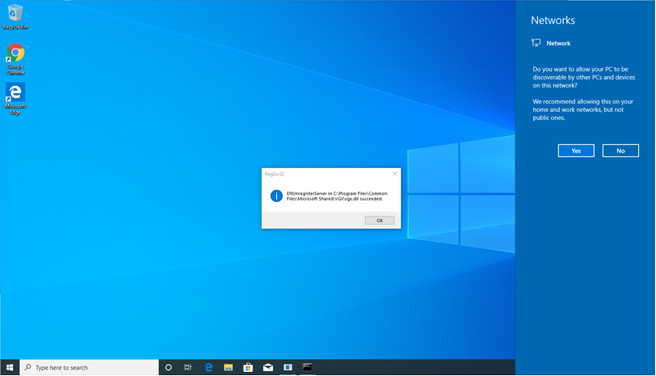
STEP 7:
When you get to the screen below, if a dialogue box appears, click OK and select Yes on the side panel.
IMPORTANT NOTES:
- If you do not see the dialog box, skip ahead to step 8.
- If you have logged in before the computer is fully configured, it may restart several times. If so, login again and continue where you left off.
STEP 8:
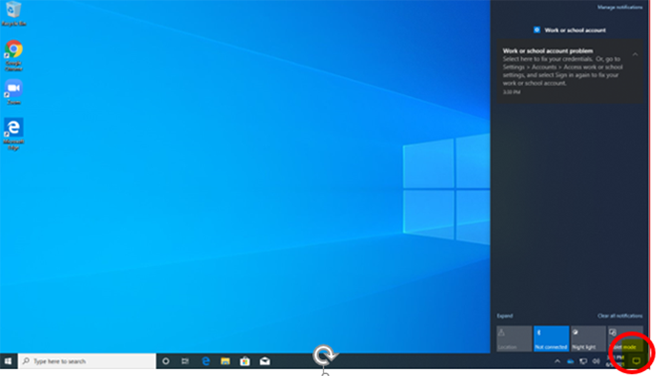
Shortly after logging in, you’ll receive a notification similar to the image shown below.
Click the alert and it will take you to a screen similar to the image shown below. If you do not see the notification, you can access by clicking in the bottom right corner, where all notifications are listed. It is circled in red.
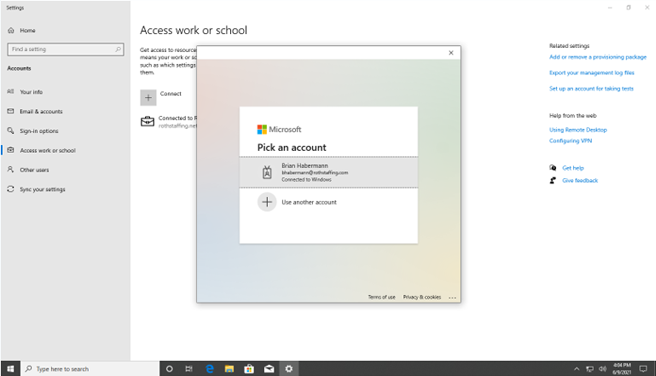
STEP 9:
You should be prompted to enter your MFA password. If it asks for your email address, do NOT proceed, wait 15 minutes and reboot.
Once reboot is complete go to the notifications area to re-attempt step 8.
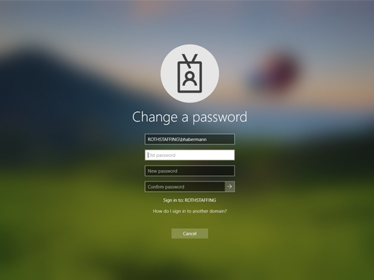
STEP 10:
Change your password.
Press ctrl+alt+delete, then click ‘Change Password’. Once you get confirmation that your password has changed, press ctrl+alt+delete again and select lock computer. Then unlock the laptop. Your password has been successfully changed.
Note: Enter your old password followed by your new password. Your new password needs to be complex which means it needs to be at least 8 characters, cannot contain any part of your name and have 3 of the 4 types of characters (Alpha lowercase, Alpha Uppercase, Numeric, special characters).
STEP 11:
Using the list below, ensure your new computer has all software successfully downloaded.
IMPORTANT NOTE: It may take up to 2 hours to fully download all the software depending on your WiFi. Your device may continue to restart during that time. Please be patient before reaching out to helpdesk.
- Outlook
- MS Teams
- Zoom – Do not login into Zoom until you have completed your bookings appointment with helpdesk (step 11). You can only login to one computer at a time.
- Chrome
- StaffSuite
- Adobe Reader
- MS Office Suite – Word, Excel, PowerPoint
- Sophos Endpoint Agent
- VPN – You should see “Roth Staffing Always On VPN” under your Wi-Fi menu
- Updated Computer Background – Background should be Roth Branded and say 2021
STEP 12:
Your laptop is ready to use!
If you have any issues with your laptop setup, please inform your hiring manager and submit a Helpdesk ticket on your first day.
Desk setup (at home and in office)
Note: You should already be equipped with a Monitor (based on where you work, this may be at home, in office, or both). If you do not have a company provided monitor, please work with your next level manager to coordinate pick-up or delivery based on the monitors available at your branch
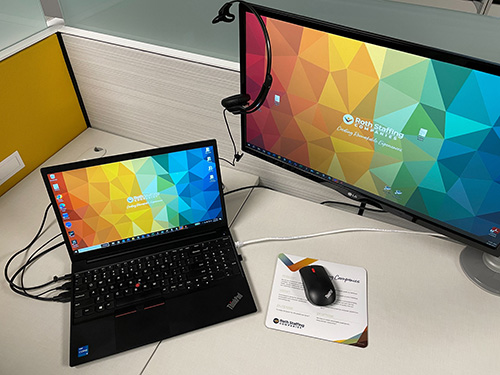
- Plug in headset directly to laptop (using USB port)
- Plug in dongle for wireless mouse to the side of your laptop (using USB port)
- Plug in charger into charging port
- Plug in HDMI cord into monitor and into laptop
- Plug monitor into wall outlet
When commuting between your branch and home office as your place of work, you will need to safely transport:
- Laptop
- Laptop Sleeve
- Headset
- Mouse
- Charger
Note: If planning to work from an office, coordinate with your next level manager to receive a HDMI cord for in office use.